(This post is part of my Frosty Festivities 2014 Blog Event – see the beginning HERE!)
It’s time for the last post of the evening… but make sure you come back tomorrow for lots more fun!
Before you leave here’s another idea for you… how about a rainbow-coloured Christmas?
There are lots of colour combinations that come to mind when thinking of Christmas, for example red & green or blue & silver. I never thought I’d use a rainbow-style colour scheme for a Christmas card, but after seeing rainbow Christmas trees on cards like THIS ONE and one on THIS POST both by Laura Bassen, I knew I had to give it a try!
Here’s how to put this card together…
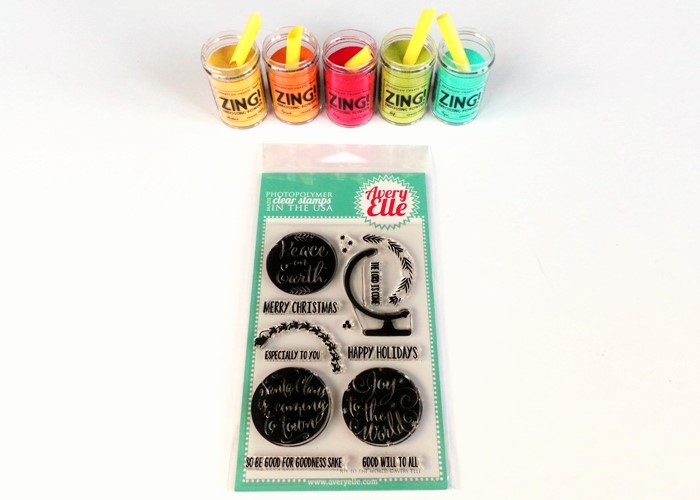
Step 1: Choose a stamp set (I’ve used Avery Elle’s Joy To The World set, which I bought from Make The Day Special), and gather some different colours of embossing powder (I’ve used American Crafts Zing powders):
Step 2: Cut a drinking straw up so you have a pointy-end scoop for each embossing powder (I think I originally got this tip from Jennifer McGuire, it makes it much easier to pick up small amounts of powder):
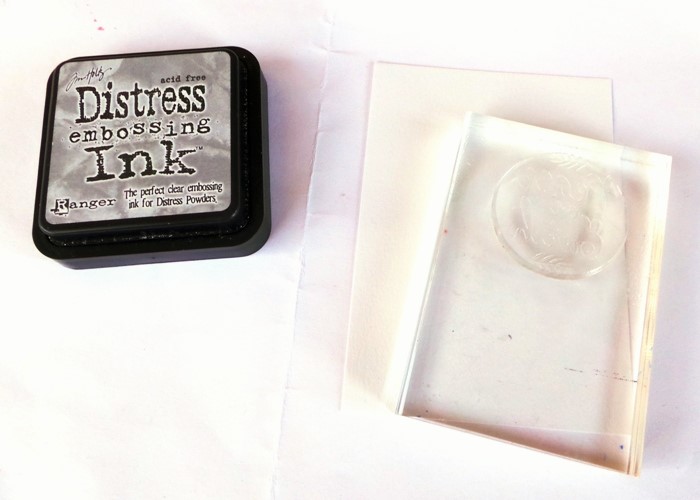
Step 3: Use a clear ink to stamp your chosen design onto a piece of smooth white card measuring 5.5″ x 3.5″:
Step 4: Use your scoops to pick up small amounts of embossing powder and tip them onto your stamped image in thin diagonal stripes:
Step 5: Tip off the powder into a pot or container of some kind. My ‘P’ in the word ‘Peace’ didn’t look very clear – I probably got too much ink on that part of the stamp:
So I used a palette knife to gently nudge the embossing powder until the letter was more clearly defined:
Step 6: Use a heat gun to melt the embossing powder:
Step 7: Stamp and heat emboss any other parts of your design, I stamped the globe stand with navy ink and used clear embossing powder on it:
Step 8: Add a piece of green washi tape, and a strip of blue glitter ribbon, near the bottom edge of the 5.5″ x 3.5″ piece of card. Stamp another sentiment if you want to (I used ‘good will to all’ from the same set):
Step 9: Mount the piece of card onto a bit of red paper, and then a bit of pale yellow paper, leaving just a thin edge of each showing:
Step 10: Now for embellishments! Grab the excess rainbow coloured embossing powder which you shook off your design earlier (mine was in a foil pie-dish):
Use it to colour two wood veneers, using clear ink on their surface and tipping the rainbow powder on. Make sure you have something like tweezers to hold the wood veneers in place while you heat them up!
I added a couple of gems too, and the card could have been left like this. But it was a bit too ‘Clean And Simple’ for my taste…
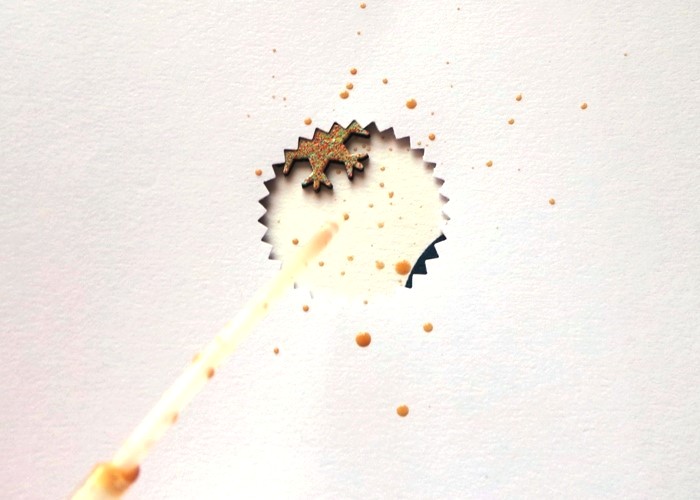
Step 11: Flick on some drips of gold mist. To make sure the mist drops only went on the parts of the card where I wanted them to go, I punched a circle (well, a pinked circle) in a spare piece of card, and flicked the mist only through this hole, moving it to different places on the card as I worked:
Then it was done! I love how the rainbow colours make it feel so joyful!
Be Inspired:
Use rainbow colours for a Christmas project
Mix up different colours of embossing powder
Make a clean and simple card, then add one last detail to finish it off
Thanks so much for joining me for the first day of the event, I hope to see you again tomorrow!
P.S. I am entering this card into the Avery Elle Challenge #18!
Bye for now,
Jennifer x


Beautiful card and a great idea for scooping up the embossing powder!
LikeLike
Lots of great tips there Jennifer, love the colours of the embossing powders you used.
LikeLike
Love your card….it is very jolly!!!!!!!! Super idea with the straws!!
LikeLike
Well, I’ve filled a page of my note book with ideas today. I’m looking forward to tomorrow!
LikeLike
This is very cool. I have never mixed embossing powder before. Definitely would like to try that.
LikeLike
What a great idea!
LikeLike
Love the rainbow effect!! Lots of great tips and techniques on this post to try! Thanks for a terrific first day!!!! Can’t wait for tomorrow!
❤ J
jwoolbright at gmail dot com
HerPeacefulGarden.blogspot.com
LikeLike
Another amazing idea. Love what you’ve done with the colours to emboss, and not wastage either – those little stars are perfect!
LikeLike
I loved the stamp when i saw your sneak peek so thank you for the details as I loved how you used the globe with the embossing powders.
LikeLike
Beautiful card!! Love the embossed wood pieces!! See you tomorrow!! x
LikeLike
Now that’s a tip I could have done with yesterday!! I got into a right mess with embossing powder. I’ll be jooking out a straw tomorrow to have another try…thank you! The rainbow effect you’ve made is fabulous ..and i was wondering what you done with the mixed colours and then i scrolled down. You think of everything 🙂 love your card x
LikeLike
A lovely bright card 🙂
LikeLike
Wow so cool! This is inspiring for sure 🙂
LikeLike
Fab card, Jennifer, love the idea of multiple embossing powders in both ways you showed!
LikeLike
So bright and fun…great ‘scoop’ idea.
LikeLike
I really like how colorful this is with that bit of rainbow!
LikeLike
Fabulous idea and thanks for the tip on the drinking straw scoop.
LikeLike
http://julenebydesign.blogspot.com.au/2014/11/jennifer-grace-creative-card-crew.html
Here’s my clean and simple card with one last surprise addition.
LikeLike
O.K. . . . seriously! You’ve got me wanting every color of embossing powder that is out there after seeing this. LOVE it!
LikeLike
So FUN! LOVE how you created your rainbow embossed background! Thanks so much for playing along with Avery Elle AEI{heart}U!
LikeLike