(This post is part of my Frosty Festivities 2015 Blog Event – see a list of all the posts HERE)
I’m sorry there was no post yesterday. My son’s ill, just a cough and a cold, but he’s been off school with it and waking up a lot during the night, so after a few exhausting days it was time for a day away from blogging! We spent yesterday recuperating and he’s doing a bit better today. So I’m back with another festive project for you, this time it’s a layout with some shrink plastic embellishments…
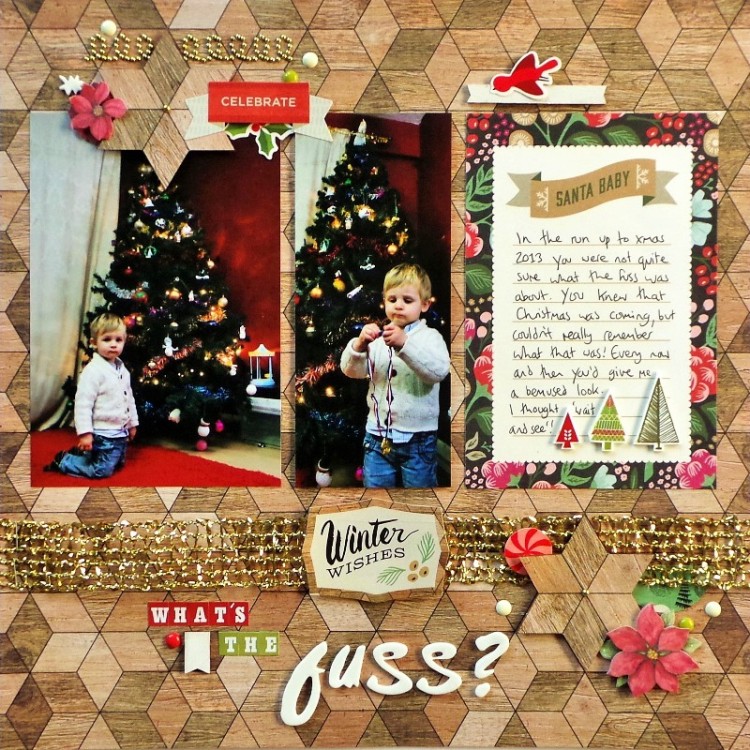
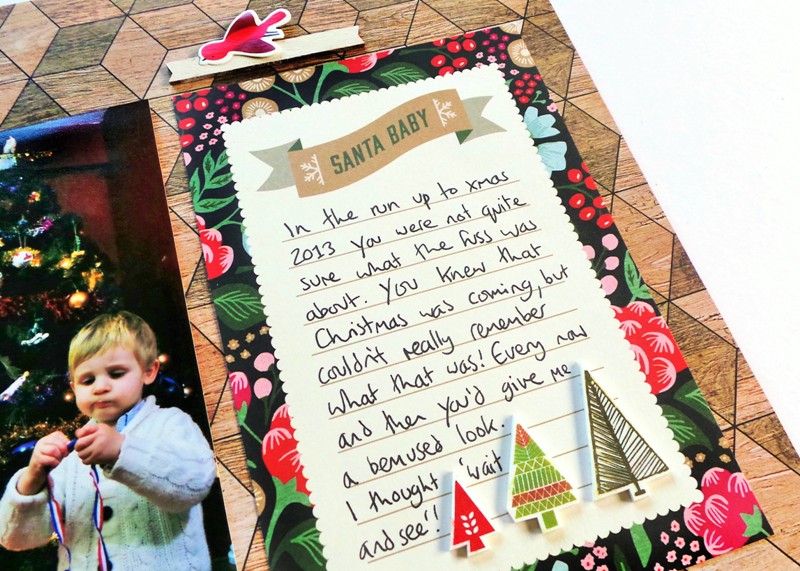
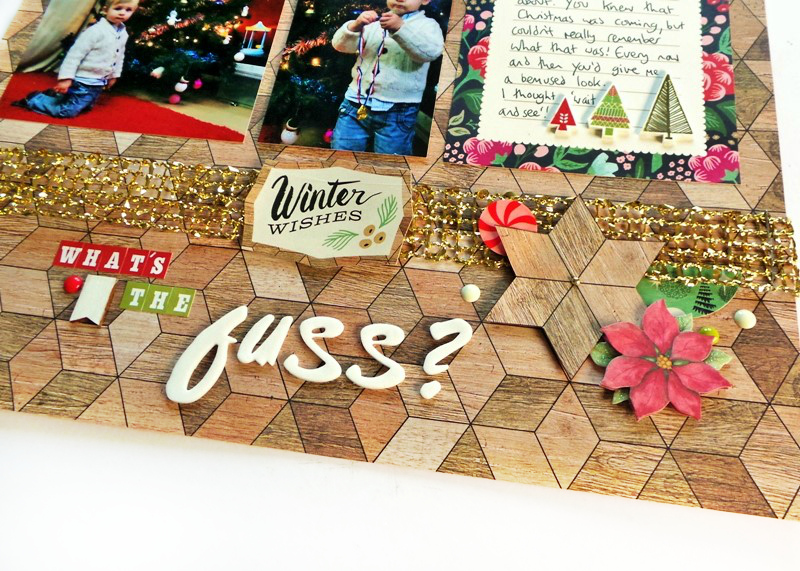
This page is about how my son didn’t really get what all the fuss was about in advance of Christmas 2013… he’s certainly excited for Xmas 2015 though!
Can you spot which ones are the shrink plastic embellishments? It’s the little line of trees on the journal card!
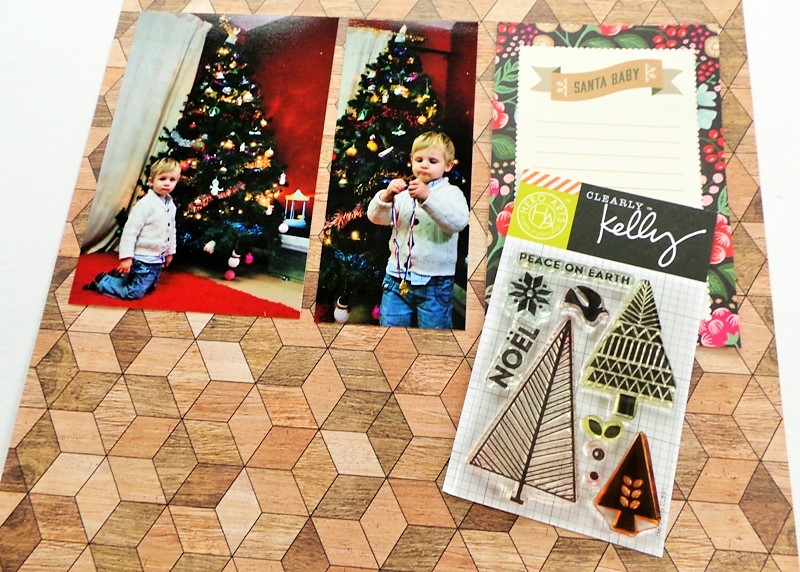
I made them using the Clearly Kelly ‘Noel’ stamp set. I figured they went well with my page, but I couldn’t stamp them straight onto the busy background, so I went looking for something else to stamp them onto:
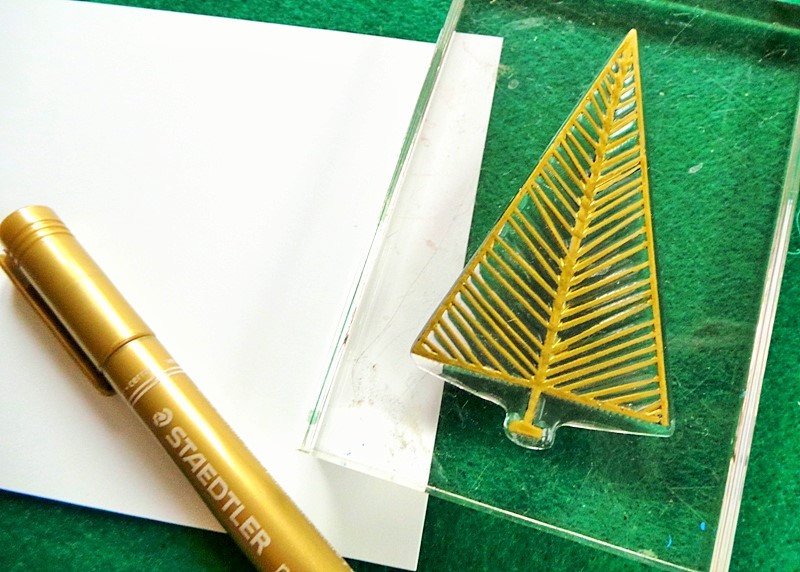
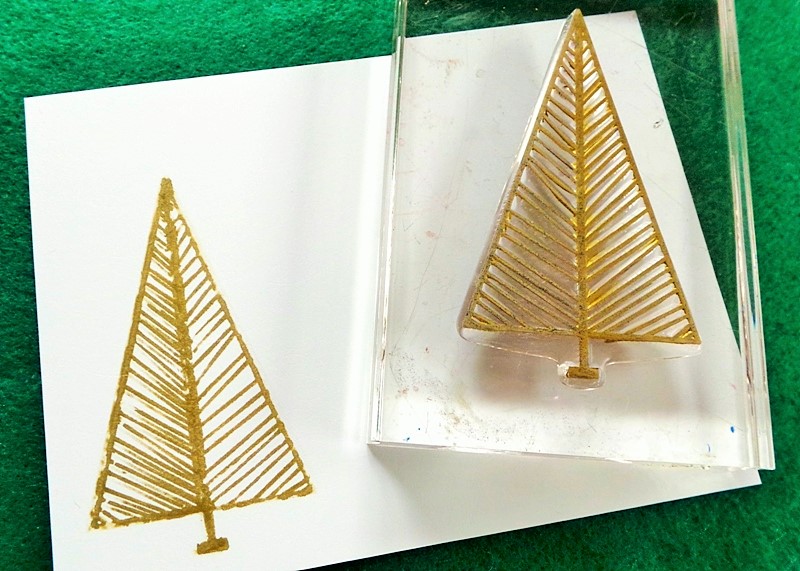
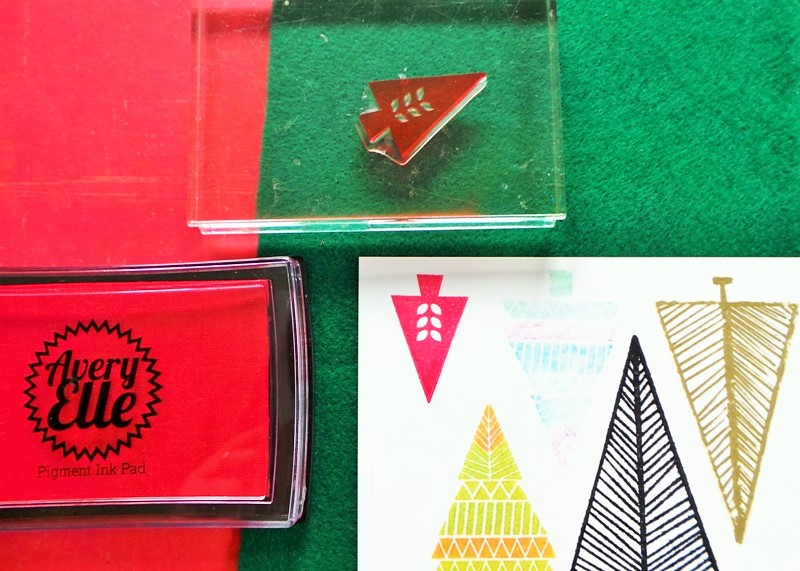
I found a sheet of white shrink plastic (the brand I used was Shrinkles). I wanted to stamp a gold tree, but I didn’t have a good gold ink pad, so I tried colouring the image with a Metallic Gold pen from Staedtler, before stamping it onto the ROUGH side of the shrink plastic:
Note the green underneath the plastic – it’s a piece of felt which I used to try and give a better impression of the stamped image.
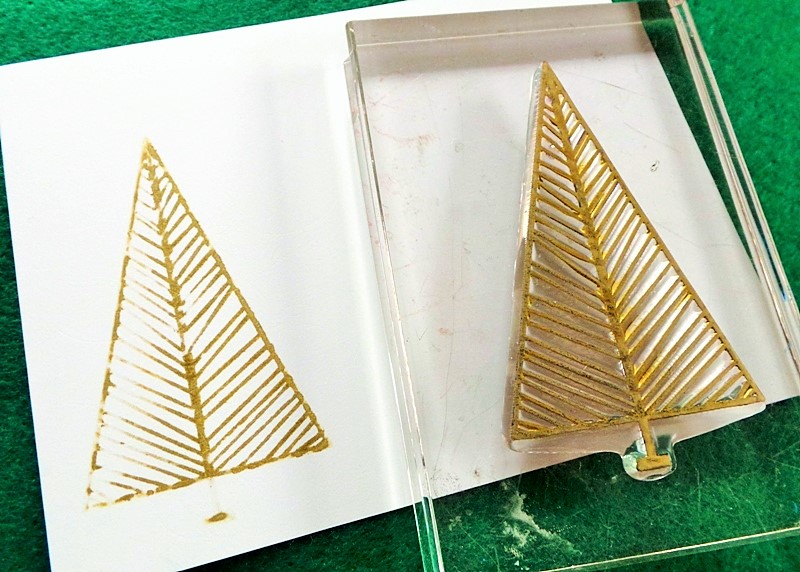
Unfortunately it didn’t come out that well the first time. But it wasn’t because the felt didn’t work – it was because the ink had dried too much on the side I’d coloured first – maybe because I had stopped to take a photo of the coloured-in stamp! Here’s what the first layer looked like:
I coloured the stamp just on the one side which needed more coverage, and stamped again on top of the first image:
It was slightly out of alignment but I decided I quite liked the effect!
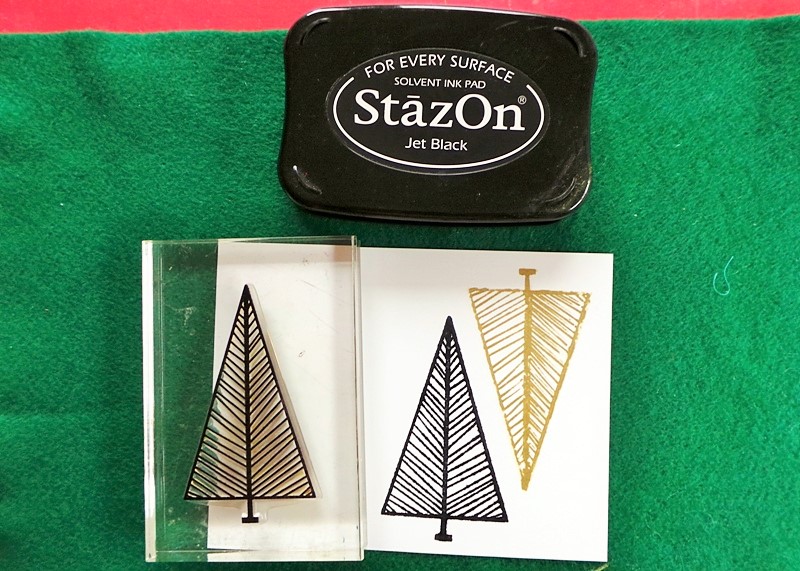
I stamped the same tree again, using black StazOn ink (I didn’t end up using this tree on the layout):
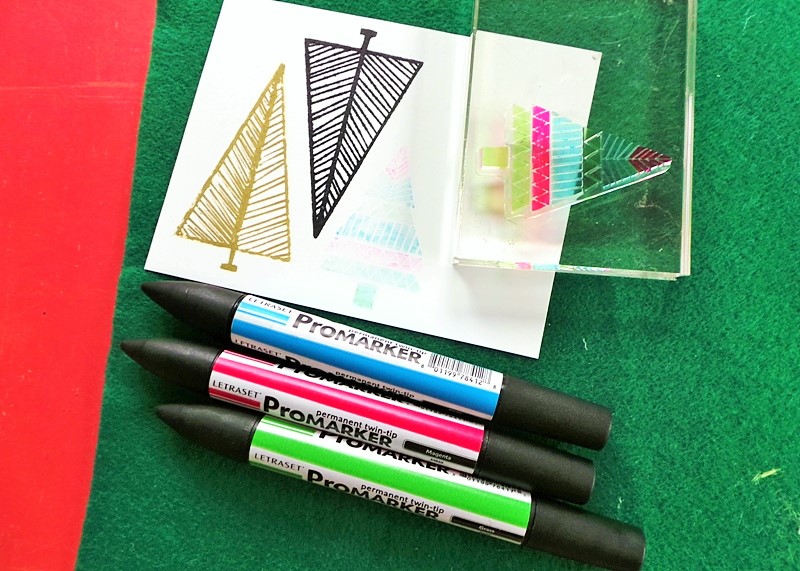
Next I attempted to colour the stamp again, but I made a big mistake. I tried to use ProMarkers. Don’t do this! The stamped image was really faint and I stained my stamp. Lose-lose. Oh well, we live and learn:
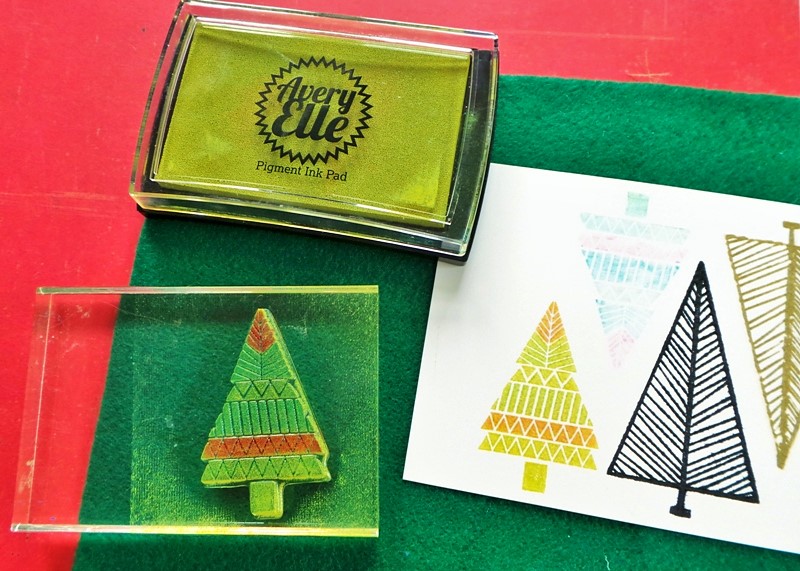
I cleaned the stamp and used it again, with green pigment ink this time. But some of the pink ProMaker, which wouldn’t come off when I was cleaning the stamp, did come off on the stamped image:
Again I quite liked the accidental effect!
Finally I stamped the little tree using red pigment ink:
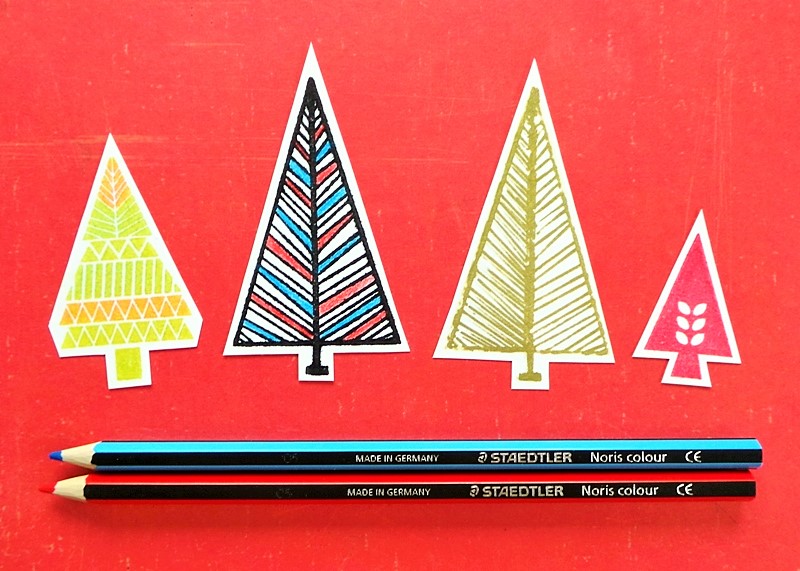
I cut out the four colourful trees and used Staedtler pencils to add some red and blue to the black tree:
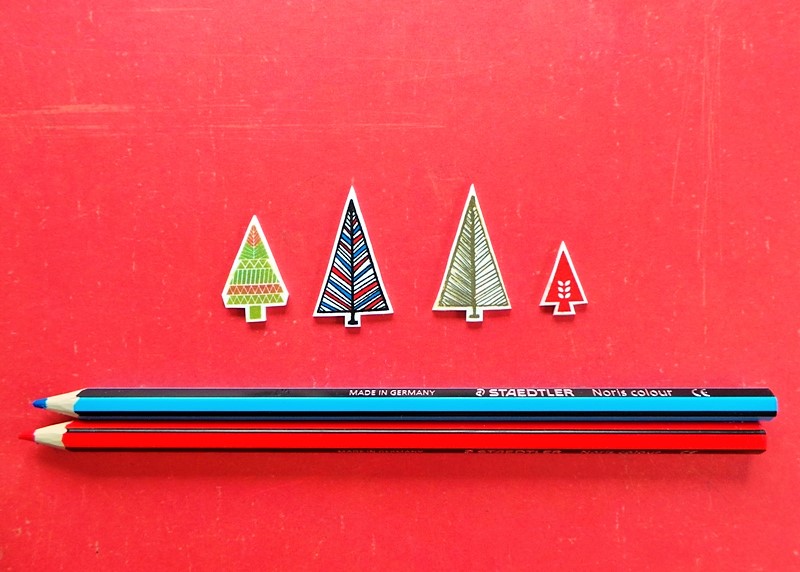
Then I shrunk them in the oven according to the manufacturer instructions. Here’s how they looked when they came out – I left the colouring pencils in the photo so you can see how much they shrunk:
I decided the black, red, and blue one didn’t really match my page, but the others look really cute all lined up on the journal card:
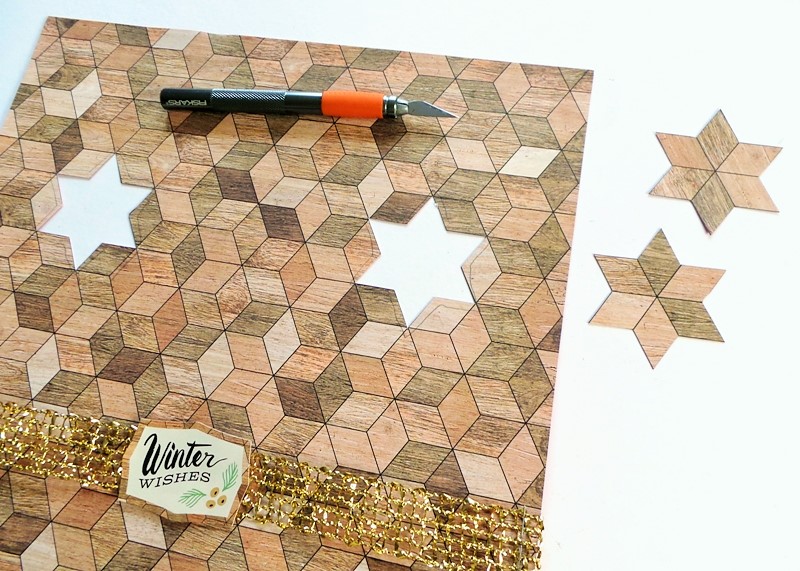
Another thing I did on this page was to cut some stars from the background pattern to use on foam dots (I got the idea to do this from a card on the Basic Grey blog HERE):
When adding them back on to the layout I made sure they overlapped something on at least one edge, so they stand out as well as blending in!
The cream enamel dots and white painted wood veneers were added as an afterthought, as I decided the page looked too dark with all that wood.
Be Inspired:
Stamp some images then cut them out to use as embellishments
Cut an image from a background sheet to use at the front of the project too
Cut a photo or patterned paper piece so that it’s tall and skinny
Have you ever used shrink plastic to make embellishments before?
Remember that commenting on this post, and any post that goes live during November 2015, will count as another entry into the Grand Giveaway {NOW CLOSED}, but only if you’ve registered your interest in winning that prize right HERE!
I’ll be back tomorrow at 8am GMT with another sponsored giveaway!
Jennifer x

Love the shrink plastic trees on your fun layout! I have some of that around here somewhere! Forgot how fun it is!
I think I have the same lousy bug that your son has… here’s to feeling better!
LikeLike
Gorgeous page Jennifer, the shrinkies are really fun and I love the cute photos :o)
LikeLike
I have used shrink plastic…I like how it stands out…loved seeing your exploring process….really interesting! And the trick with the stars is GREAT – thanks for sharing, as I’m going to try remembering that one! Love your page….that gold sparkling stuff…nice touch:):)
LikeLike
I love fussy-cutting elements, so I am in search of a worthy stamp!
LikeLike
Nope, have never used shrink plastic but I did see a demo at a class I took about 10 years ago and I thought it was really cool. She heated them with a heat tool but I noticed that you put yours in the oven. Your little trees are adorable and I like that you showed all the steps – I really want to try this! I would love to make my own embellishments! Thanks to you, I’ll be adding shrink plastic to my wish list!
LikeLike
Glad your son is feeling better! Thanks again for a wonderful post. Shrinky dinks are such fun and this is a great idea on how to use stamps to make some mini-embellishments.
LikeLike
I have used shrink plastic with my class in Vacation Bible School…but not with my own crafting. Your trees turned out really cute!! Thanks for showing us your process…..very helpful and informative. Wonderful LO!!! Such a sweet young man. Hope he is feeling a lot better by now!
❤ J
jwoolbright at gmail dot com
HerPeacefulGarden.blogspot.com
LikeLike
Oh they are fab! I’d never have guessed they were shrinkie dinks
LikeLike
I love playing with shrink plastic and your trees are too darn cute!
LikeLike
Nope, never played with shrink plastics before…..
I just have to find where I can buy them and have a go!
Your’s looks amazing… who would have thought to shrink stamping down! Now that’s a handy tip!
LikeLike
haven’t used shrink plastic for ages but I will be digging it out again xxx
LikeLike
Love the camouflage embellishments on this layout
LikeLike
How pretty! I’ve never used the shrink plastic-you make it look so easy.
LikeLike
What a fun layout, Jennifer, super cool shrink embellishments!
LikeLike
Love the shrink plastic trees. I’ve made brooches with it before.
LikeLike
I’ve never used shrink plastic – I’m not even sure if you can get it here in NZ. If we can, though, I’d be keen to try it!
LikeLike
Oh, I always forget about those sheets of shrink plastic that I have in my stash but this is a reminder of how fun they are to use. Those shrinky trees are so cute!
LikeLike
What a fun layout with all those layers and the little shrinky plastic embellishments! And just look at how clever those stars are, cut from the background paper. I would never have even thought to do this!
LikeLike