
Lately I’ve been spending a lot of crafty time with the kids. Here’s one of our latest projects, which Little Miss wanted to make for a local competition…

It was a fun project using recyclable items and crafty stuff we already had, so I’m sharing it as it can be something to turn to when the kids are bored!
Here’s the leaflet we received about the competition:

Basically you had to use recyclable items as the base for your project, and then you could add crafty stuff like paint and glitter on top.
We gathered together lots of bits that would normally go in our recycling bin:

And Little Miss rifled through for inspiration. I am always determined to let my kids steer their projects rather than suggesting / guiding them too much – they always come up with things I would never think of!
Once she’d chosen a few bits she started building the body together using sticky tape (I sat beside her and kept passing her bits of tape):

We had to make sure the wizard stayed under 40cm tall per the competition rules.
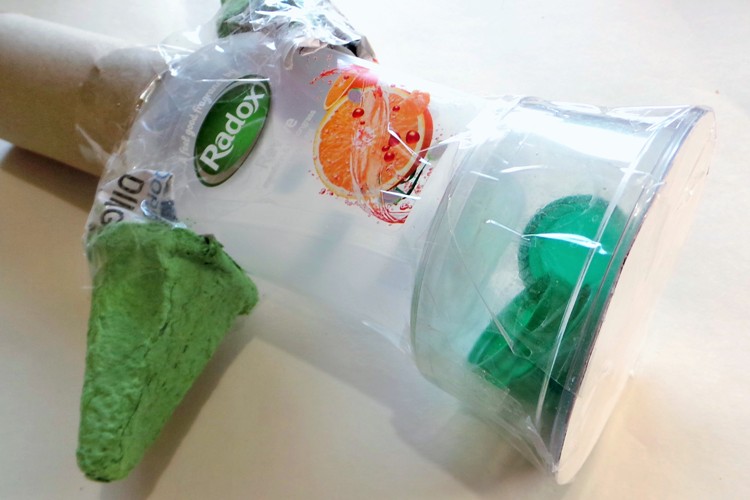
He has an empty salsa pot and a soap bottle as the body, egg box arms (with a bit of newspaper padding) and a toilet inner cylinder as the head:

Now Little Miss came out with one of those unexpected gems… she wanted the wizard to rattle. You have to pick the wizard up and say ‘abracadabra’, give him a shake, then you can hear the magic happening!
She found these milk bottle tops to make the rattling noise and taped them inside the salsa pot:
She also chose a plastic cup for a hat. Then she started coating the hat and body (inc all the sticky tape) with newspaper and glue:

I helped out a bit with the paper-mache as it takes a while!
We left the wizard to dry overnight at this point. Then the next morning it was time to paint it all. Cheeky boy wanted to join in at this point so I gave him some paper and let him go crazy experimenting with the paint:

Here’s what the parts looked like when painted:

Finally the wizard needed some finishing touches. The facial features were drawn with permanent markers. He had to have recycling symbols on somewhere so Little Miss stuck one on his hat and one on each armpit! I don’t think she was aiming for armpits but that’s what it looked like to me – I smiled and didn’t comment. She also made hair and eyebrows from newspaper, a wand out of cardboard, a beard out of an envelope (the printed inside), and a tie out of a ring-pull:

She added some glitter to the base of his cloak and to the top of his hat, then he was all finished (Cheeky Boy photo-bombed this picture, but they looked so cute I had to use it):

The added fun with the glitter is that when you shake the wizard to hear him rattle you also shower magical glitter everywhere! Didn’t think about that but it seems appropriate.
There are so many ways to adapt the wizard / witch, I’ve seen a wizard with an owl perched on his head, a witch wearing recycled jewellery, and another wizard with a see-through body!
With this project, my birthday card using recycled items, and an activity making junk creatures at Rainbows, I’m all recycled out right now! Which is okay, because I just received some new-to-me scrappy items I bought in a sale, so I’m itching to use them. Time to break open the box.
Have a great day,
Jennifer x

That’s a very cute wizard!
LikeLike
Thats brilliant! ikwym about the kids coming up with gems, I always think that when I craft with my daughter 🙂
LikeLike
Hehe! He is amazing!
LikeLike