
(This post is part of my Frosty Festivities 2015 Blog Event – see a list of all the posts HERE)
Well, it’s the last day of November, which means it’s also the last day of my Frosty Festivities 2015 event. Have you enjoyed it?! I have a few things to mention and then I have one last project to inspire you with!
There’s a list of all the Frosty Festivities 2015 posts on THIS PAGE of my blog. Make sure you check to see if there’s any posts you missed, especially all the giveaways {ALL NOW CLOSED}! Look at all the fabulous prizes you could win:

Al the giveaways and the challenge to be inspired stay open until 10pm GMT on next Sunday the 6th of December {ALL NOW CLOSED}. Winners will be announced on Thursday the 10th of December so make sure you check back to see if you’ve won.
If you have enjoyed the event, I’d be really grateful if you can pin or share the projects you like. Whilst I do enjoy making all the projects, running the events, and reading your comments, it’s visitor numbers that convince me to run it again and convince sponsors to add a prize. So the more visitors the better!
Talking about sponsors, make sure you shop at Lettera Etc, The Paperdashery, Little Dorrit & Co, Feed Your Craft, and SVG Files Shop, when you can, to thank them for being fabulous sponsors!
If you have any questions or suggestions about how these events are run, then don’t hesitate to contact me at jennifergrace(at)hotmail(dot)co(dot)uk!
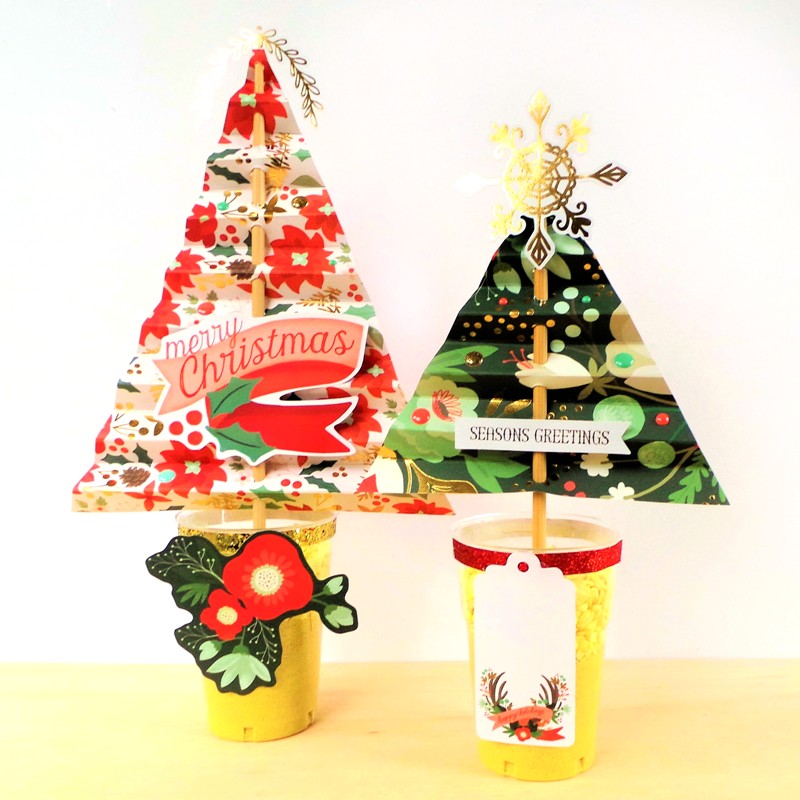
Now for one last project, these Concertina Christmas Trees:
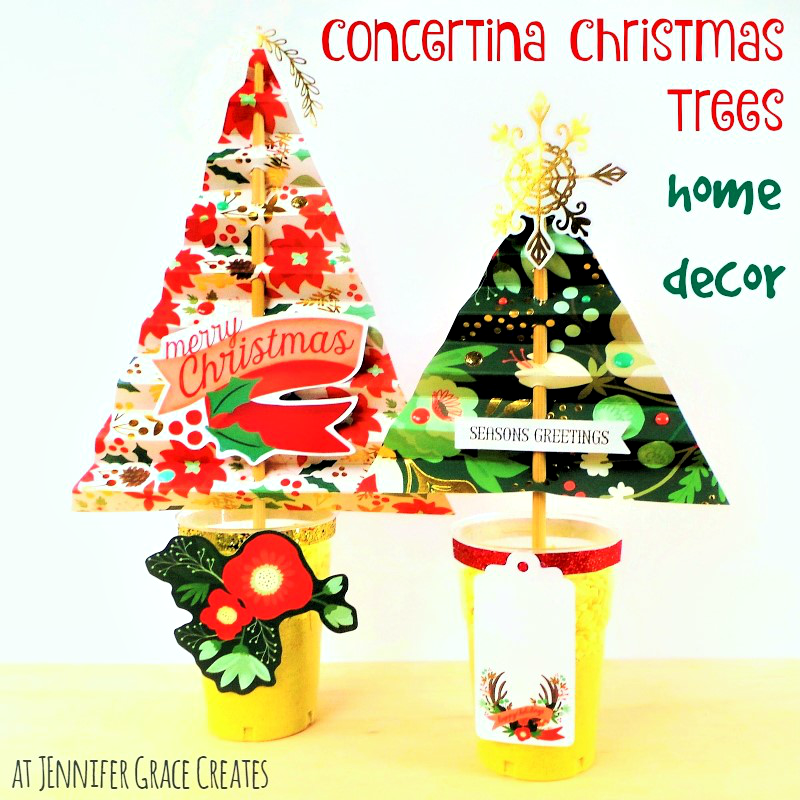
These were a fun way to use a bit more of my favourite Christmas collection (Christmas On Market Street by My Mind’s Eye)!
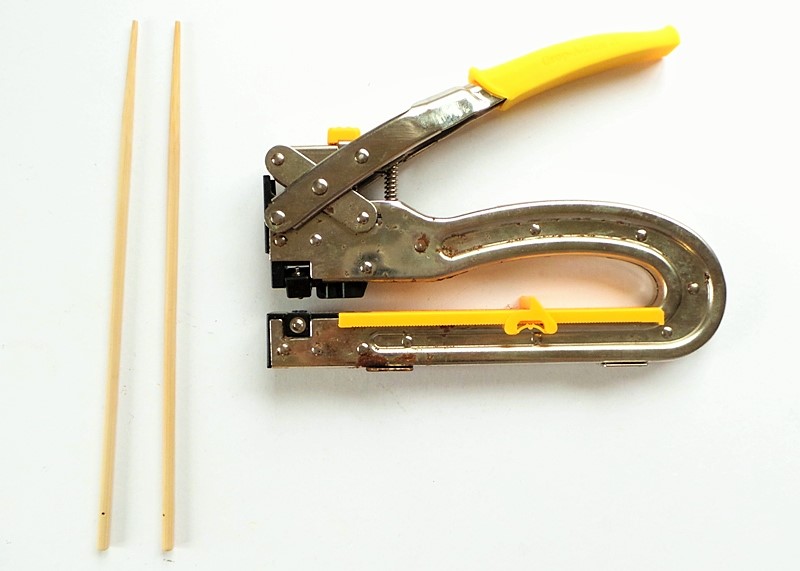
I started with a pile of items from the collection, plus some plastic cups, a score board, a hole punch, a hot glue gun, some sand, and some bamboo sticks:

However I did end up swapping the bamboo sticks for chopsticks, as the bamboo sticks were too thick, and swapping the hole punch for a big bite hole puncher, as the normal hole punch couldn’t reach far enough:
If you want to make some of your own…
Step 1: Cut 2 triangles from patterned paper. One of mine is 11″ tall, and the other is 7.5″ tall:

Step 2: Score the trees horizontally at regular intervals – my score lines are about 3/4″ apart:
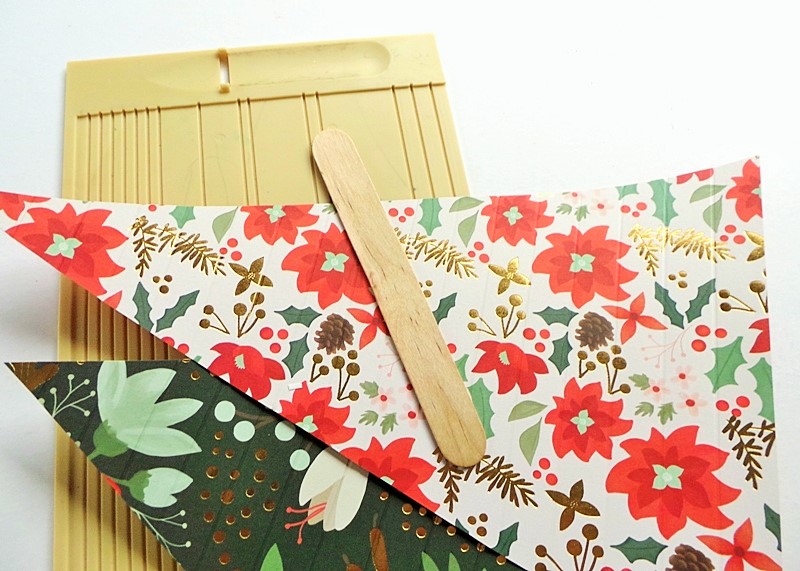
Step 3: Concertina the trees by folding back and forth along the lines:

Step 4: Draw a line down the center vertically on the back of your triangles. Then punch holes on each panel, along the line:
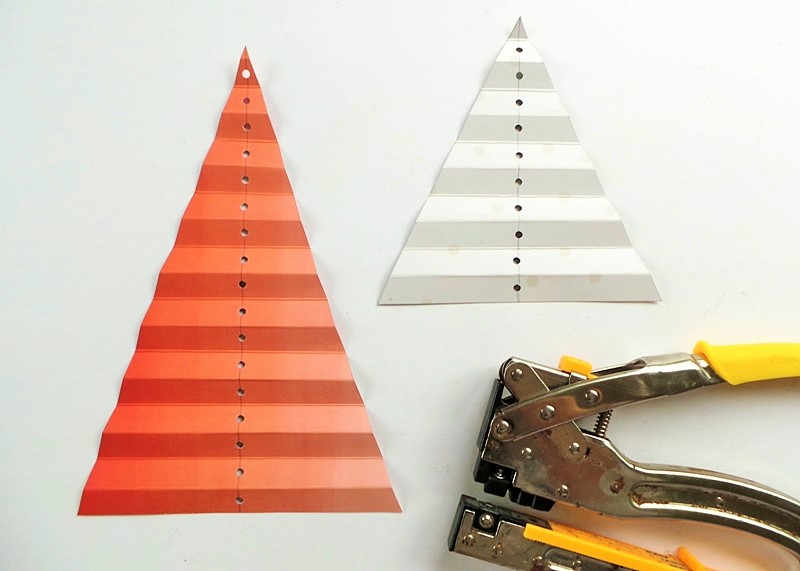
Step 5: Make the holes a little larger by gently pushing the chopstick through, from the front of your triangle to the back, to widen them:

Step 6: Push the trees onto the chopsticks:

Step 7: Use hot glue to add some embellishments – I added a gold snowflake and a gold garland to the tops of the trees, and sentiments in the middle:

Step 8: Add any other embellishments – I added a few enamel dots to each tree:

Step 9: Decorate the plastic cups by hot glueing on some glitter ribbon at the top, and another die-cut card embellishment at the front:

Step 10: Fill the plastic cups with coloured sand (I had to add some coloured stones too as I didn’t have enough sand), then stick your trees in and put them on display:
Make sure you display them somewhere that they won’t get knocked over and spill sand everywhere!
These concertina trees would also look good made in miniature and added to cards and scrapbook layouts! You don’t even have to punch holes and add a stick if you’re going to be sticking them down flat.
Be Inspired:
Make some concertina Christmas trees
At glitter tape around the rim or edge of something
Use a wooden stick on a project or page
Remember to let me know what you thought about the event. Which was your favourite project?
Thanks so much for stopping by! I have enjoyed reading every single comment! Bye for now,
Jennifer x

ahhh! How clever and cute!!! I love MME, what a fab and fast decor to make with the kids! Thank you for all of your hard work, I really love stopping by your blog each day for new inspiration!
LikeLike
The christmas trees are great fun. Have really enjoyed all your Frosty Festivities posts….thanks for all your hard work and inspiration.
LikeLike
These are festive and pretty!!! Thanks for such fun ideas that are actually workable for me. I can’t say which is my favorite because I have enjoyed seeing them all and trying some of them out. I think I like your fast and easy card ideas the very best because I already feel a time crunch for Christmas cards.
Thanks for the wonderful event and for all the work you did making it so much fun for us all.
❤ J
jwoolbright at gmail dot com
HerPeacefulGarden.blogspot.com
LikeLike
These are adorable – I could do this! I think barbecue skewers would work – I have some wooden ones. Personally I have enjoyed your event immensely! I found it incredible inspirational – the down side for me is that I haven’t been felling well lately so I haven’t been doing much crafting. I’m slowly getting my mojo back and your event has helped! My favorite project this month was the triangular Christmas ornament – I plan to make one of these! I also loved your Clean and Simple cards made with the stickers! The shrink plastic is another one I want to try! Need to order some shrink plastic! The blog hop was a lot of fun and I had a few favourites there as well. I really enjoyed all of your layouts too – I’m not a scrapbooker but it’s something I want to try so these were great! Sorry I couldn’t pick one favourite! I hope you continue your event next year because I got lots of fabulous ideas here! I will head over to your sponsors’ pages and thank them as well. Wishing you all the best for the holidays!
LikeLike
oh boy… I LOVE your events because they always happen when my mojo is waning. I’ve kicked started a couple of projects (one being my 2008 Dec Daily) by using your inspirational suggestions! And as always – tried out some new things I’ve never done before!!! Got to always love that! I’m also going to miss not seeing a new post going up each day and loved seeing new shops and products to visit – its all been FABULOUS! A big thank you from me! Well done Jennifer – your commitment to this has been HUGE!
LikeLike
How cute are those trees???? Love these!!!
Laura
http://www.24-7style.com
LikeLike
Another cute project! You could also use old Christmas cards to recycle some of the ones that are too pretty to toss. I really like your idea to make mini ones and use them to add dimension to scrapbook pages.
LikeLike
So cute! I am going to use a wood grain drinking straw for the trunk & make a card to accompany a popcorn/cranberry garland that I am sending as a surprise. So perfect for what I need. The rest of my week is laid out for me with all the things I’ve been inspired to make from the Festivities this past month!
Thanks again for all your hard work. xo
LikeLike
Super idea!! I hope you won’t mind but I will tell my daughter about these…she is a Beaver Leader and is always looking for stuff they can do!!!!!!!! I have really enjoyed the Festivities….even though I had to play catch-up as I was away for some of it!!! Thank you for all your hard work and the super ideas you have given us!! Will look forward to the next one!!
Don’t know if I can pick a favourite project because there were lots that I really liked and still have to get round to trying!! I have got the shrinky stuff so that is next on the agenda!!!!!
HAPPY CHRISTMAS AND HAVE A WONDERFUL NEW YEAR!!!!
LikeLike
These are so pretty, Jennifer, and such a creative use for that gorgeous paper!
LikeLike
Another fun project – I’m loving glitter tape right now (all the fun without the mess). My favourite projects were your scrapbook pages, especially the snow/dark photos page which I found particularly inspiring. However there’s something I can take from all of them of course! Thank you so much for running this event, it’s been a great way to get into Christmas-mode.
LikeLike
Oh, another really fun and unique Christmas craft idea!! I am hoping to make one of these with my little grand-daughter, but in the meantime I want to thank you for all the wonderful ideas and inspiration! I have several crafts bookmarked for later, because I just plain ran out of time…but I loved them all!
LikeLike
What a cute and simple idea, they would make great table decorations and I could even get the grandkiddies making them – with a little help here and there! Thanks for another fun event Jennifer – I haven’t had time to play along with you this year, but a Frosty Festivities notification always brightens up my inbox and I’ve really enjoyed all the fun posts :o) Happy Christmas! xxx
LikeLike
These trees are adorable! I love this idea and can see how fun it would be to make some of these! I have lots of great Christmas papers too! Lots of great ideas and I have enjoyed seeing all of them, but I think these trees are my favorite! Fun wrap up to a fun event!
LikeLike
Oh! This is a goody! Love it to bits. My sort of ‘easy’ and fun project! I’ve been away, so I think I’ve missed a bit…but I’ll try and catch up! LOOOOVED your whole month of goodness…. I think my fave was being introduced to those AMAZING mini flair….& the best project – or the one that really inspired me was the string around the jar idea:):) THANKS so much for all the effort you put into this:) Happy Christmas to you and yours!!!!
LikeLike
What a fabulous tree and gorgeous tutorial . Will be pinning it
LikeLike
These are cute! I can imagine a cluster of them on a shelf. You come up with some gorgeous ideas.
LikeLike
now those trees are cute…I think I might make a mini version and add it to my Christmas journal. Thanks for all your blog posts full of such a variety of ideas… just wish I had more time to join in! Have pinned a few things to try and will be back to review all the posts again … have a great Christmas xxx
LikeLike
great project
LikeLike