
Hello! Today I’m going to show you how I made the wood-effect pieces and beaded pins that are part of my January Counterfeit Kit!

First up –
Wood Veneer Style Pieces!
To make these you’ll need:
- Some chipboard shapes
- Acrylic paint in white, yellow and brown
- A paintbrush
- A piece of fine sandpaper
- A baby-wipe
Step 1: Choose which chipboard pieces you want to use:
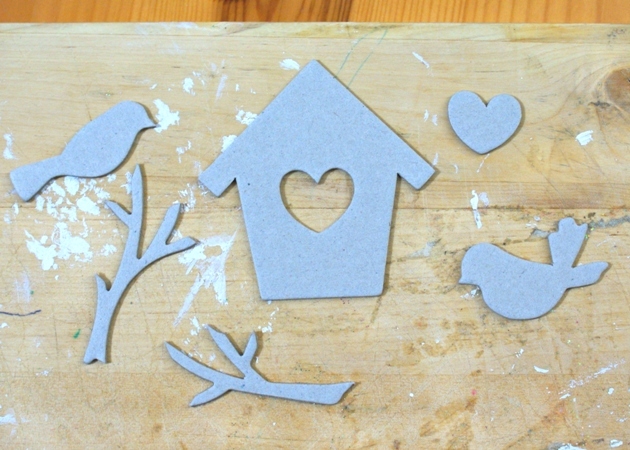
Step 2: Paint the front of them with 2 coats of white acrylic paint. Try not to paint the edges too much, as wood veneer pieces usually have dark edges, so it looks better if they stay as bare chipboard as much as possible:

Step 3: Mix a teeny-tiny bit of yellow and brown paint in with a big blob of white acrylic. I then painted one coat which was pale-yellow looking (I forgot to photograph that stage) and then mixed in a bit more brown for the next coat of paint so it looked warmer:

Step 4: Once this is dry, use fine sandpaper to rub gently all over the pieces, so you’re revealing the pale yellow coat, beneath. It doesn’t matter if you reveal a bit of the white paint too – but try not to sand it right back to the bare chipboard:

Step 5: Rub your fingertips over the pieces to remove any sandpaper residue. Then mix some medium brown acrylic paint, and use a dry paint brush to pick up a little of the paint, and add lines to one of the pieces:

Step 6: Quickly, before the paint dries, wipe off some of the paint with a baby-wipe, moving the wipe in the same direction as your painted lines, to blur the edges and take off some of the paint:
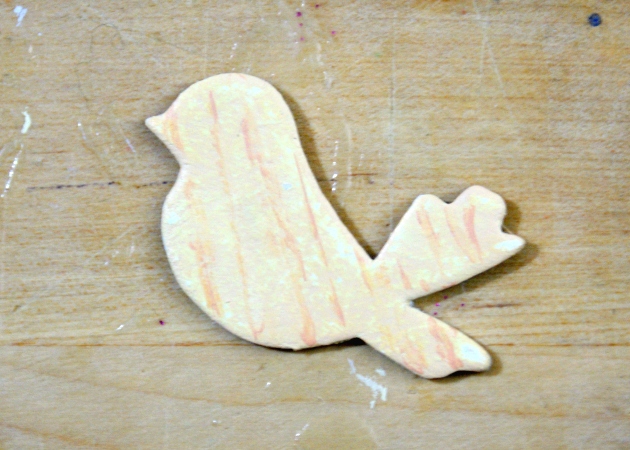
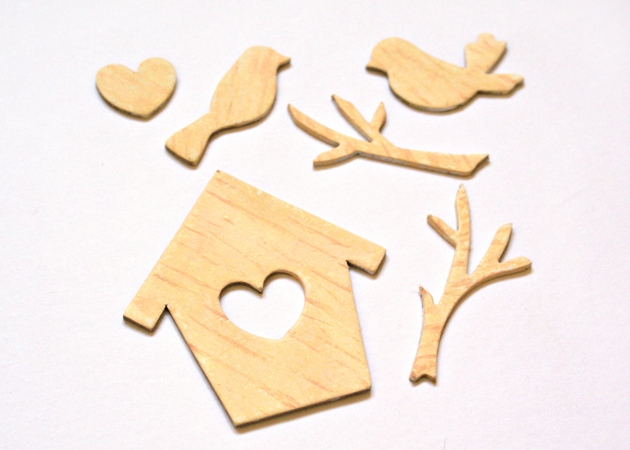
That’s it! Just repeat the last two steps on one piece at a time until you’ve got all your pieces looking nice and wood-like:
Now here’s how to do the –
Beaded Pins
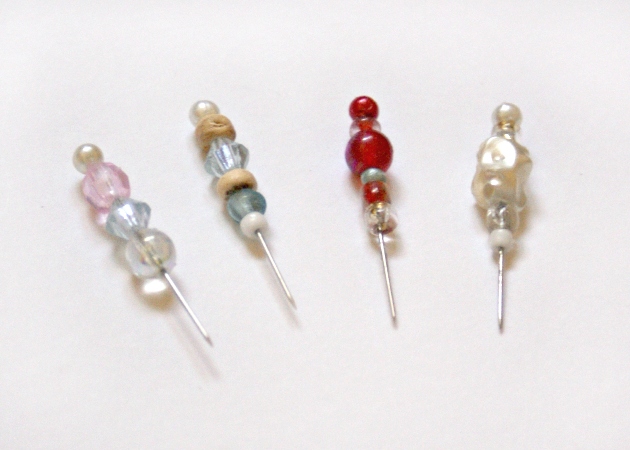
Step 1: Start with some pearl headed pins (from a haberdashery) and a selection of beads. If you don’t have any pearl headed pins you could glue a bead to the top of a pin first and leave it to dry completely before the next steps:

Step 2: Decide on the beads you want to use, and the order you want them to go in:

Step 3: Carefully dip the hole end of each pin, one at a time, into some wet glue that dries clear, and then push the bead onto your pin, glue end upwards. So you’re sticking the first bead to your pearl head, then each one afterwards is sticking to the bead above it:

That’s it! Just wipe off any excess glue as you go and then leave all your pins to dry thoroughly:
If you stick your pins to your projects by using a 3D foam dot, to push the pin point into, it will make extra sure the beads don’t fall off! I have also since made some more beaded pins by just glueing the last bead – putting the glue onto the bottom of the last bead after it had been pushed onto the pin. But I don’t know if I trust those ones to stay together as much – I might try it with some superglue next time.
There we go! Let me know if you have any questions. Keep an eye on the Counterfeit Kit Challenge Blog for links to other tutorials!
If you use these tutorials in any way to inspire your projects I’d love to hear about it! And don’t forget I’m happy for you to pin this post to your Pinterest boards if you have them, so you can check it again another day.
I shall be sharing my first projects made using my January Kit within the next couple of days! x

Your wood -look is so effective! It’s a very clever way to give a lift to chipboard. Many congratulations on your appointment to counterfeit – I’m looking forward to seeing what you come up with- and a Very Happy New Year to everyone in your house from everyone in ours
LikeLike
Such an creative way to create a woodgrain look. I love it!
LikeLike
fantastic creations, thank you for showing us how.
LikeLike
I love your wood veneer pieces! I did something similar, but I like your painting steps/technique better – I’m going to have to try it with some chipboard. Thanks for the ideas!
LikeLike
Love your wood veneers!
LikeLike
i wondered where the wood veneer pieces came from! they are fab! x
LikeLike
love your wood veneer piece, great idea!happy new year!
LikeLike
YOu are so creative! I especially love the beaded pins.rinda
LikeLike
Great tutorial, very creative!Thanks for sharing!!
LikeLike
This is so cool! Those stick pins are awesome!
LikeLike
that’s a good way to uplift chipboard, and I love the beaded pins. Great tutorial, good luck with your new appointment! I’m sure thee will be lots of good things to follow x
LikeLike
Great posts. Loved the veneer look
LikeLike
Oh my gosh, such an awesome tutorial! I love the beaded pins!!!
LikeLike
I love what you did with the chipboard!!!
LikeLike
Great job with both tutorials and I love the faux wood tutorial!
LikeLike
Thanks for these great tutorials. Yes, I am pinning!
LikeLike
Wow! that wood effect is fab and I love the beaded pins idea too – thanks Jennifer! :o)
LikeLike
Now that is seriously clever! They look so realistic – I was halfway down before I realised what you were up to. Brilliant! Looking forward to lots more inspiration in 2013 :).
LikeLike
So clever and creative! That faux wood looks amazing!
LikeLike
Love the idea of the faux wood pieces! Great technique!
LikeLike
brilliant ideas! Thanks so much for sharing them! 🙂
LikeLike
Wow, these are fantastic, and the wood pieces are so realistic!!! Thanks so much for sharing your tutorials!
LikeLike
Love the faux wood shapes!
LikeLike