
(This post is part of my Frosty Festivities 2013 Blog Event)
I have wanted to make a spool ornament for a couple of years (after seeing THIS ONE by Linda Auclair). I finally got round to it for this event, and I have a feeling I’m going to be making lots more, as it was so easy and ended up so pretty! Here’s mine…
Vintage Spool Ornament:

Want to know how to put it together? Here you go:
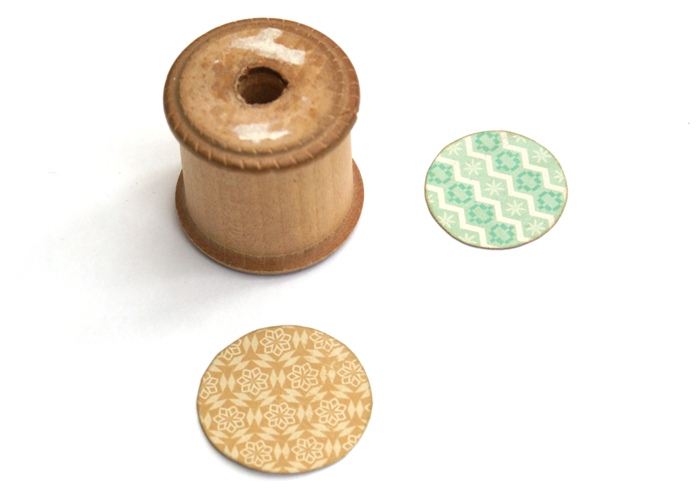
Step 1: Find a wooden spool. I bought mine at a vintage fair, it had thread on it then but I’ve used that up by now! It measures approx 1¼” tall by 1¼” diameter:

Step 2: Peel off the labels, and cut circles of patterned paper for the top and the bottom of the spool, inking the circle edges with a gold ink pad (my papers are from a Crate Paper Bundled Up 6×6 pad):
Step 3: Stick the circles onto the spool (I used a glue stick), and pierce two holes in the centre of each circle, over the hole in the spool centre:

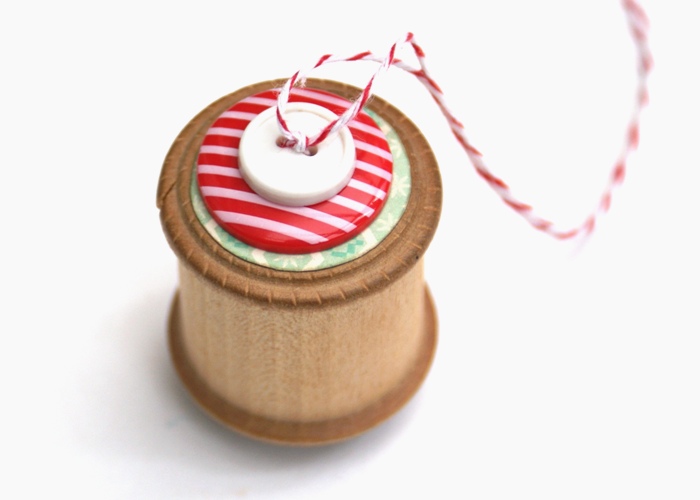
Step 4: Use a darning needle to thread bakers twine through two buttons at the bottom of the spool, then up through the spool centre, and through two buttons at the top of the spool. If your button has four holes you only need to go though two of them:

Step 5: Tie a knot above the buttons at the top of the spool to hold the bakers twine in place:
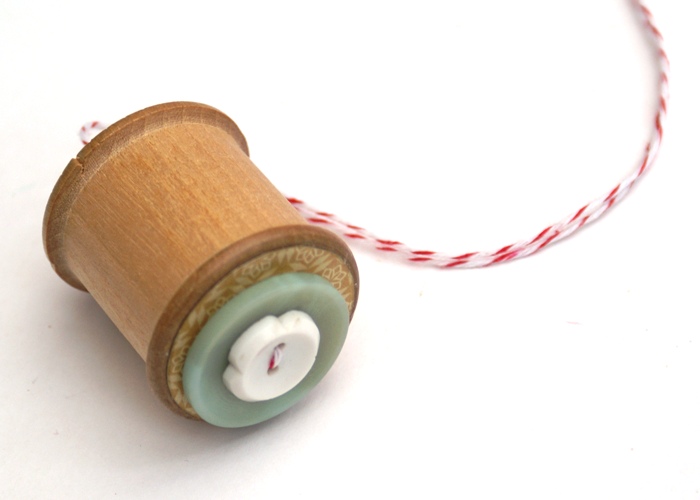
Here’s what the bottom of the spool looks like:
Step 6: Decorate the rest of the spool as you like! I used some more Bundled Up paper (stuck on with a glue stick again), and a bit of gold trim hot-glued around the top. I altered a piece of Bundled Up Ephemera – glittering the edge using Mod Podge and American Crafts White Spark Glitter, and adding a red gem to the centre, before hot-glueing it to the spool:

I can’t wait to hang this on my tree! Little Miss has asked if she can make one too. Have you ever made a spool ornament?
Be Inspired:
Stick a gem in the centre of a snowflake
Alter a vintage item
Pile up some pretty buttons
That’s the last post for this evening, but I’ll see you again tomorrow at 10am GMT for a day filled with inspiration, challenges, and another sponsored giveaway!
Jennifer x
P.S. If you are enjoying this event, I’d love it if you can support me by sharing the projects you like via Pinterest, Facebook, Twitter or however you like! There are sharing buttons below to make it easy for you – thanks! (Not obligatory but appreciated!)

This is fab … such a great idea! the small patterns on the Bundled up 6 x 6 papers work well! x
LikeLike
So clever – never would have guessed from the sneaky peek!
LikeLike
Super cute! I have not made one before but I might now. Thanks!
LikeLike
It certainly fooled me on Facebook!! Very cute idea.
LikeLike
Ooohhhh—I like this!! So beautiful! Great idea!
LikeLike
This is super!! Think I might have some reels like that!!!!!!! LOL
LikeLike
This is just so sweet I love the vintage feeling and they would look lovely hanging on a tree 🙂
LikeLike
Ingenious! Well done!
LikeLike
That is stinking cute!
LikeLike
This is darling! I have sooo many of those – can’t wait to craft some of these :~) Thanks!
LikeLike
I like the layering of the buttons. That’s a pretty label too. Have a wonderful night.
Julie
I Create Purty Thangs
LikeLike
Here I am again! Visited & commented on every last charming blog in the hop – spent a lovely evening meeting your friends!
Thanks for hosting this event – it is FAB.
LCSmithSAVED@juno.com
LikeLike
Love this idea – and I even have a few antique spools that I can use!
LikeLike
Really cute! What a fun ornament!
LikeLike
That’s stinkin’ cute!
LikeLike
Beautiful ornament!
LikeLike
How cute is that! Love it. Will have to go through my sewing box to see if I have any nearly empty spools.
LikeLike
Oh. this is adorable. I need some of these wood spools now. i love it.
LikeLike
I hadn’t ever heard of a spool ornament before. Yours turned out adorable!!
❤ J
jwoolbright at gmail dot com
LikeLike
This looks great, I really like the buttons and the white glitter.
LikeLike
Brilliant idea, one for my list me thinks!
LikeLike
I love this and gave some old cotton reels too
LikeLike
ooh so pretty and sparkly
LikeLike
Such a clever idea – love it 🙂
LikeLike
Ooh I am impressed that I guessed this was a hanging decoration but didn’t realise it was an altered spool great tutorial thank you.
LikeLike
Thanks for sharing.
LikeLike
So cute, what a great idea!
LikeLike
Awesome! I wish I had some wooden spools. I will decorate some plastic ones and see how they look.
LikeLike
Super cute
LikeLike
This is really pretty!
LikeLike
Cute idea!…it has a real vintage feel to it
Alison xx
LikeLike
This is adorable-pinned it to try with my kiddos!
LikeLike
I recently sold around 60 wooden cotton reels just like these.Hmm I’ll see what I can find to use for something similar.
LikeLike
Oooo I have a few of these. I’m definitely referring back to this tutorial.
LikeLike
Fantastic!!! I have dozens of old wooden spools that used to belong to my grandma. I will make these out of them and give them to my mom and each of her sisters. Great idea, thank you!!!
LikeLike
So pretty, love the piled-up buttons 🙂
LikeLike
I have a collection of spools that would be perfect for this project. Thanks!
LikeLike
This is so cute and so easy! You’ve got my wheels turning….would be a great project to do with kids and scraps. I’m going to have to start looking for spools!
LikeLike
so pretty. when I think of all the wooden cotton spools we had when I was little and we would either throw them out or make those finger knitting things out of them – that make a tube of knitting? whatever they are called 🙂
LikeLike
i really really love this idea. My mum has lots of these spools so I can see myself nabbing them!!
LikeLike
Super cute, Jennifer! Thanks for the shout out. 🙂
LikeLike
How cute are these?! I’ve Pinned this one too because its fab.
LikeLike