
DISCLOSURE: Cricut have provided me with a Cricut Explore Machine, some materials including cardstock, and access to the Image Library, to help me write this post. However ALL opinions in this post are my own and not governed or controlled by Cricut in any way.
Ever wanted some sparkly seahorse earrings?!
I love big earrings, but I have a habit of losing one from each pair… oops. So I decided it was time to make some to replenish my collection – and so that I can easily replace one if I lose it! I’ve put my Cricut Explore to good use to make these…
Sparkly Seahorse Earrings made with the Cricut Explore:

Here’s how to make some for yourself…
You Will Need:
* Cricut Explore * Aqua Cardstock * Crystal Stickles * Transparent Seed Beads * Jump Rings * Earring Hooks * Mod-Podge * Glossy Accents * Paintbrush * Jewellery Pliers *
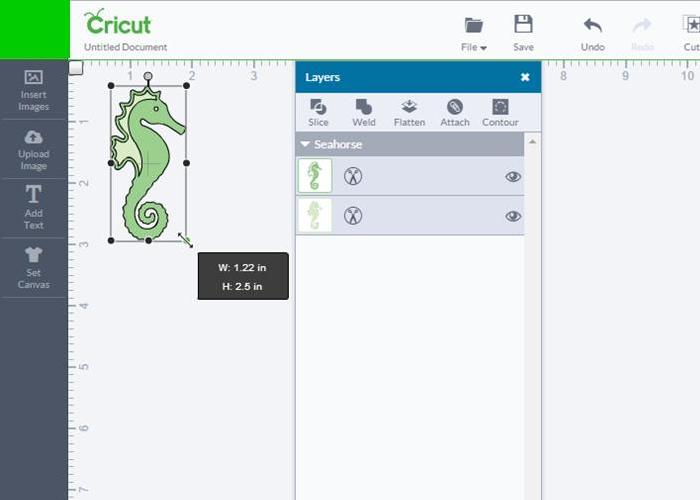
Step 1: Open up the Cricut Design Space and insert image Seahorse #M33006 from the ‘Life’s A Beach’ set. Resize it to however big you want yours to be – I made mine 2.5″ tall:
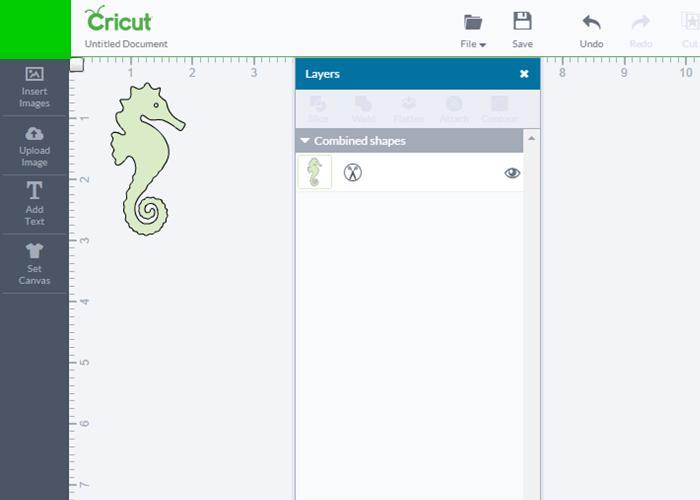
Step 2: Use your mouse to drag a box over the image to select it all:

Step 3: Click ‘Weld’ in the layers panel to join the layers together as one shape:
Step 4: Insert image Circle #MC21B7 from the Days & Dates set, resize it to be a small hole at the top of the seahorse – mine was 0.07″:
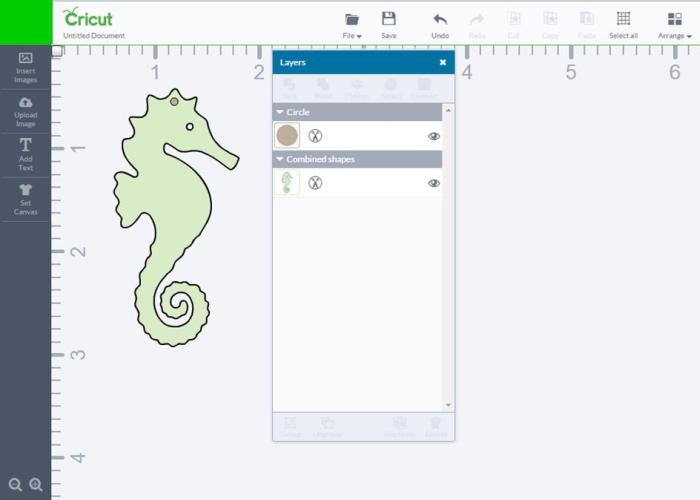
Step 5: Drag a box over the image again so the seahorse and the circle are included:

Step 6: Click ‘Slice’ on the layers panel, then drag the circle away from the seahorse, which will leave the hole at the top:

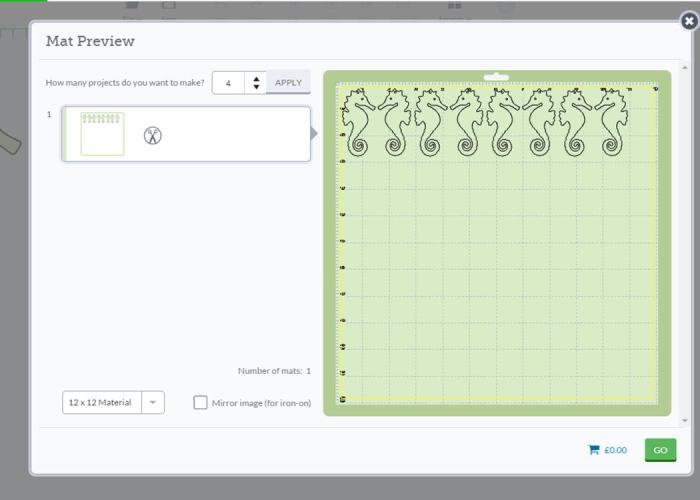
Step 7: Delete the circle, then duplicate the seahorse. Use the edit panel to ‘Mirror’ the second seahorse image:

Step 8: Drag a box over both images and click ‘Attach’ in the layers panel. Then click ‘Go’ and increase the projects to 4 – don’t forget to click ‘Apply’. Your mat preview should look like this:
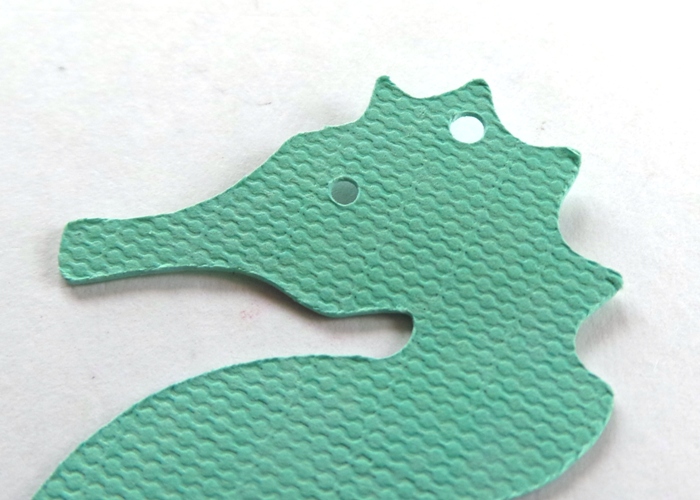
Step 9: Put some cardstock on your mat and run the cut. I used a sheet of cardstock from the Cricut Antiquity pad, and I used the setting ‘Cardstock +1’, my seahorses came out like this:

I was impressed with how well the teeny tiny holes came out:
Step 10: Put one of the seahorses on a non-stick surface and coat it with Mod-Podge or similar tacky glue – make sure it’s a nice even coating right up to the edges:

Step 11: Stick another seahorse on top, picking it up and pressing down all over it to make sure it sticks together. Repeat this until you have four seahorses stuck on top of each other. Then seal the edges with more Mod-Podge all the way around – here you can see where I’d sealed the belly but I hadn’t sealed the head yet:

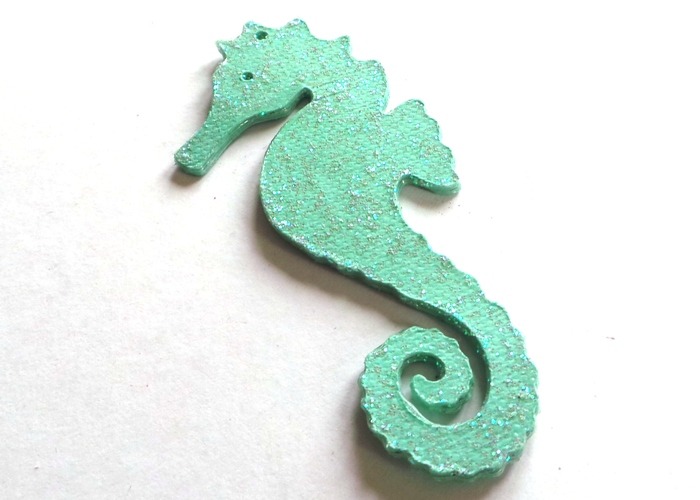
Step 12: Leave the Mod-Podge to dry – I left mine for a few hours. Then paint on a layer of Crystal Stickles to give the seahorses some sparkle:

Once they are dry (it took mine about an hour) they will be nice and shimmery:
Step 13: Add a blob of glossy accents along the fins and at the end of the tails:

And press transparent seed beads into the glossy accents. Leave to dry again (mine took about 2 hours):

Step 14: Then you just need to use jewellery pliers to attach two jump rings and an earring hook to the top of each seahorse:

Then wear your sparkly seahorses (and dream that you are a mermaid):

I am now planning to make lots more earrings with my Explore. Owls, feathers, rocket-ships, hearts… so many possibilities!
Happy Valentines day to those who celebrate it!
Have a great day,
Jennifer x
DISCLOSURE: Cricut have provided me with a Cricut Explore Machine, some materials including cardstock, and access to the Image Library, to help me write this post. However ALL opinions in this post are my own and not governed or controlled by Cricut in any way.

These look so pretty…..great idea.
LikeLike
Oooooo, nice idea Jennifer, hadnt thought of using the explore for jewellery.
LikeLike
wow…aren’t they fab!!
LikeLike
Wow, now there’s a great creative idea!
LikeLike
I think they’re gorgeous. Have seen stacked paper things like this before, but they generally look tacky and lacking. These are great….I don’t have the cricut but i have other cutting options.
LikeLike