
(This post is part of my Frosty Festivities 2015 Blog Event – see a list of all the posts HERE)
Here’s another Christmas Ornament to freshen up your festive decorations – a Winter Scene Triangle Ornament:

I want to make lots of these and fill them all with different scenes!
I have a PDF A4 Template which you can download HERE if you’d like to make your own (you will be prompted to download it, it doesn’t start automatically).

Here’s how to make your ornament. You may notice that the step-by-step photos show me using some woodgrain patterned paper as the ornament. That was my plan, until I made a mistake when it was nearly finished and ripped it – arrgghh! I will talk about that when I get to it. It turns out I actually prefer the blue card I ended up using, so it was okay!
Step 1: Print off your template and find some card or stiff patterned paper to use:

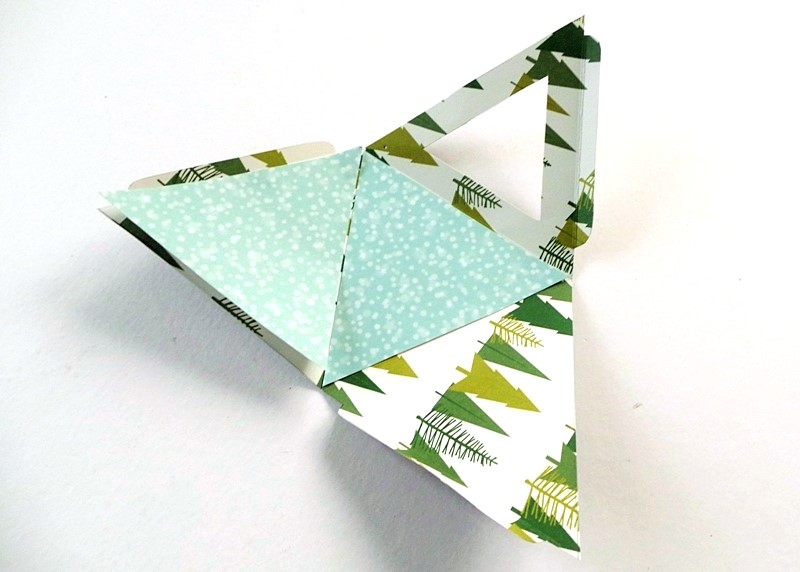
Step 2: Cut out the template and then the card just along the outer edges:

Step 3: Score along the fold lines – I just laid the template on top of the card and scored both sheets together, but you could draw the lines onto the card before scoring if you prefer:

You don’t need to put the template on top to score the tabs, just follow the edge:

Step 4: Use a sharp craft knife to cut out the window, again I just cut through both layers at once (using a metal ruler to keep my lines straight):

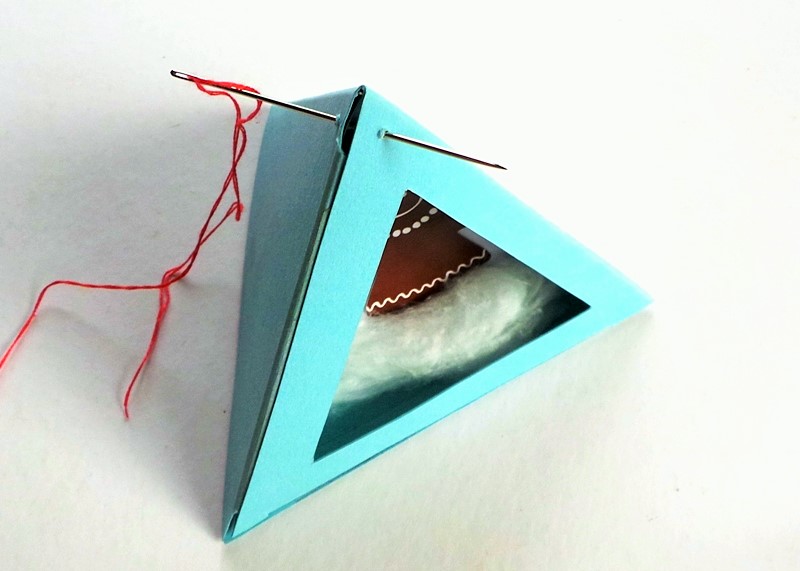
Step 5: Pierce holes for your twine or thread to go through using a paper piercer or darning needle:

Step 6: If you don’t like the pattern on the back of your patterned paper you can cut triangles from another pattern to stick inside – but don’t stick them both down yet:
You need to adhere one of the flaps together first:

And then stick the patterned triangle on top to hide the tab:

Step 7: Cut the ‘snow’ from white card and fold the edges in at an angle. Now here’s where things started to go wrong. I used tape to stick my ‘snow’ into the ornament, but I should have used hot glue:

The next steps are to stick on a tiny tree or any other images or stickers which you want in your scene, then close the ornament by taping down the other tabs (tape worked fine – a bit too well – for my tabs on the woodgrain paper, but not so well on the blue card – I ended up using glue on one tab as well as tape).
I did those steps, but then my snow fell out. I tried to stick the snow back in by pushing it back through the window, and then I ripped the edges of the window. Then I tried to undo the tape and ripped it some more… disaster! I gave up and swapped to some blue card, following all the steps above, but sticking the snow in with hot glue!
I did also cut a larger window, as I decided you couldn’t see enough of the scene. The template has been adjusted accordingly, so you will have the larger window on your ornament:

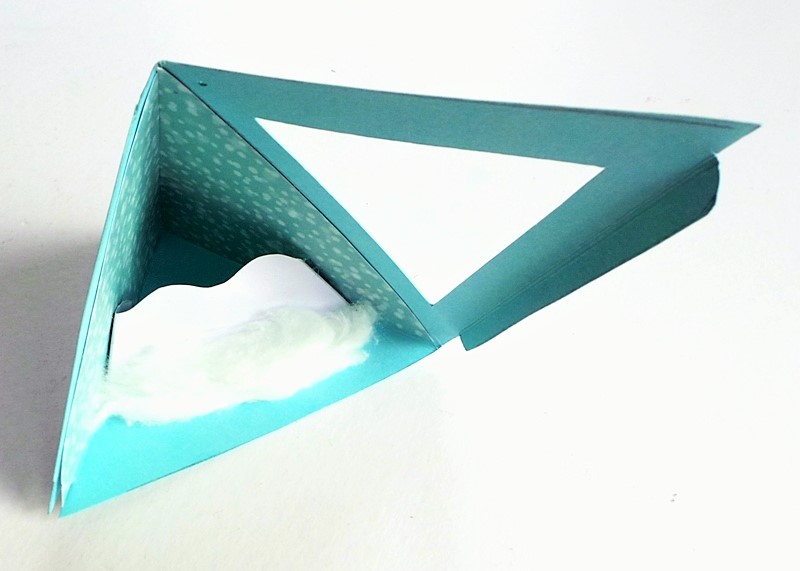
Step 8: Back to scheduled programming – stick your snow in using hot glue or another really strong glue at the sides:

Step 9: Stick a bit of cotton wool at the bottom to hide the gap and give more depth to the scene:
Step 10: Add your tree and a character sticker or chipboard piece by hot gluing them to the front of the card snow:

Step 11: Tape or glue the other tabs down so the ornament is closed, then use a darning needle to add some thread or twine to the top for hanging the ornament:
Step 12: Glue any additions you want on the outside of the ornament. This is also when I added a bit of glue to the bottom tab as the tape kept coming undone:

That’s it! Now you can hang your ornament. I’m thinking these would also look cool with a child’s drawing of a Christmas character inside instead of a sticker. I shall get Little Miss to design some!
Be Inspired:
Make a triangular Christmas ornament
Add some cotton wool snow to a project
Create a winter scene on a layout or card with snowy hills and tiny trees
What Christmas or winter character would you add to your snowy scene?
Remember that commenting on this post, and any post that goes live during November 2015, will count as another entry into the Grand Giveaway {NOW CLOSED}, but only if you’ve registered your interest in winning that prize right HERE!
I’ll see you again tomorrow!
Jennifer x

WOW! Another great project. Thanks for the template and the tutorial. Your ornament came out darling and there are so many fun possibilities.
LikeLike
This is absolutely adorable! I love the shape of the ornament too. I’m thinking I might have some fun dies that would create a cute scene inside too! Have to do this….
LikeLike
That is so cool! I love it!
LikeLike
Oh! That is waaaaay cute! Can see a Christmas manger with the baby Jesus in there too:)
LikeLike
that is so sweet and could be adapted for so many things
LikeLike
This is so cool! OMGoodness, I love it! Thank you so much for the template! I’m going to download now! So many possibilities… I would add either a snowman or a penguin!
LikeLike
Would be fun to put a cutout of each family member as the “character” in the scene, with their name on the outside in place of the word! My mind is racing 🙂
LikeLike
Great tutorial for this adorable ornament idea!! The little gingerbread gal is so cute.
❤ J
jwoolbright at gmail dot com
HerPeacefulGarden.blogspot.com
LikeLike
What a great unique idea!! LOL…. would be a forest scene with a deer!!! hee hee
LikeLike
Cute idea!
LikeLike
What a super project!! Think I would have to have a snowman!!!
LikeLike
This is such a cute project….would look great with a Santa inside as well.
LikeLike
This is SO adorable and so fun! That triangle shape makes it really unique and I love your little gingerbread scene!
LikeLike
If I was doing a Christmas-in-winter ornament I’d be very happy with the gingerbread girl, she’s such a cutie! I’ve been a bit challenged to come up with a southern hemisphere icon though – maybe Santa in swimming gear?
LikeLike
Whata great classroom project. Easy enough to set up with this template and loads of scope so that pupils can individualise the ornaments. Not going to cost a fortune either. I love it
LikeLike